GoogleKeep2Notion Documentation
Follow these steps to sync your Google Keep notes to Notion in a few minutes.
- 1
Install the Extension
Open the Chrome Web StoreClick the button below to open the GoogleKeep2Notion page on the Chrome Web Store, then click "Add to Chrome" (on Edge, click "Allow" in the prompt).
After installing, the GoogleKeep2Notion icon appears in your browser toolbar — click it to open the side panel.
- 2
Open the Extension and Click "Copy Template"
Click the GoogleKeep2Notion icon to open the side panel on the right.
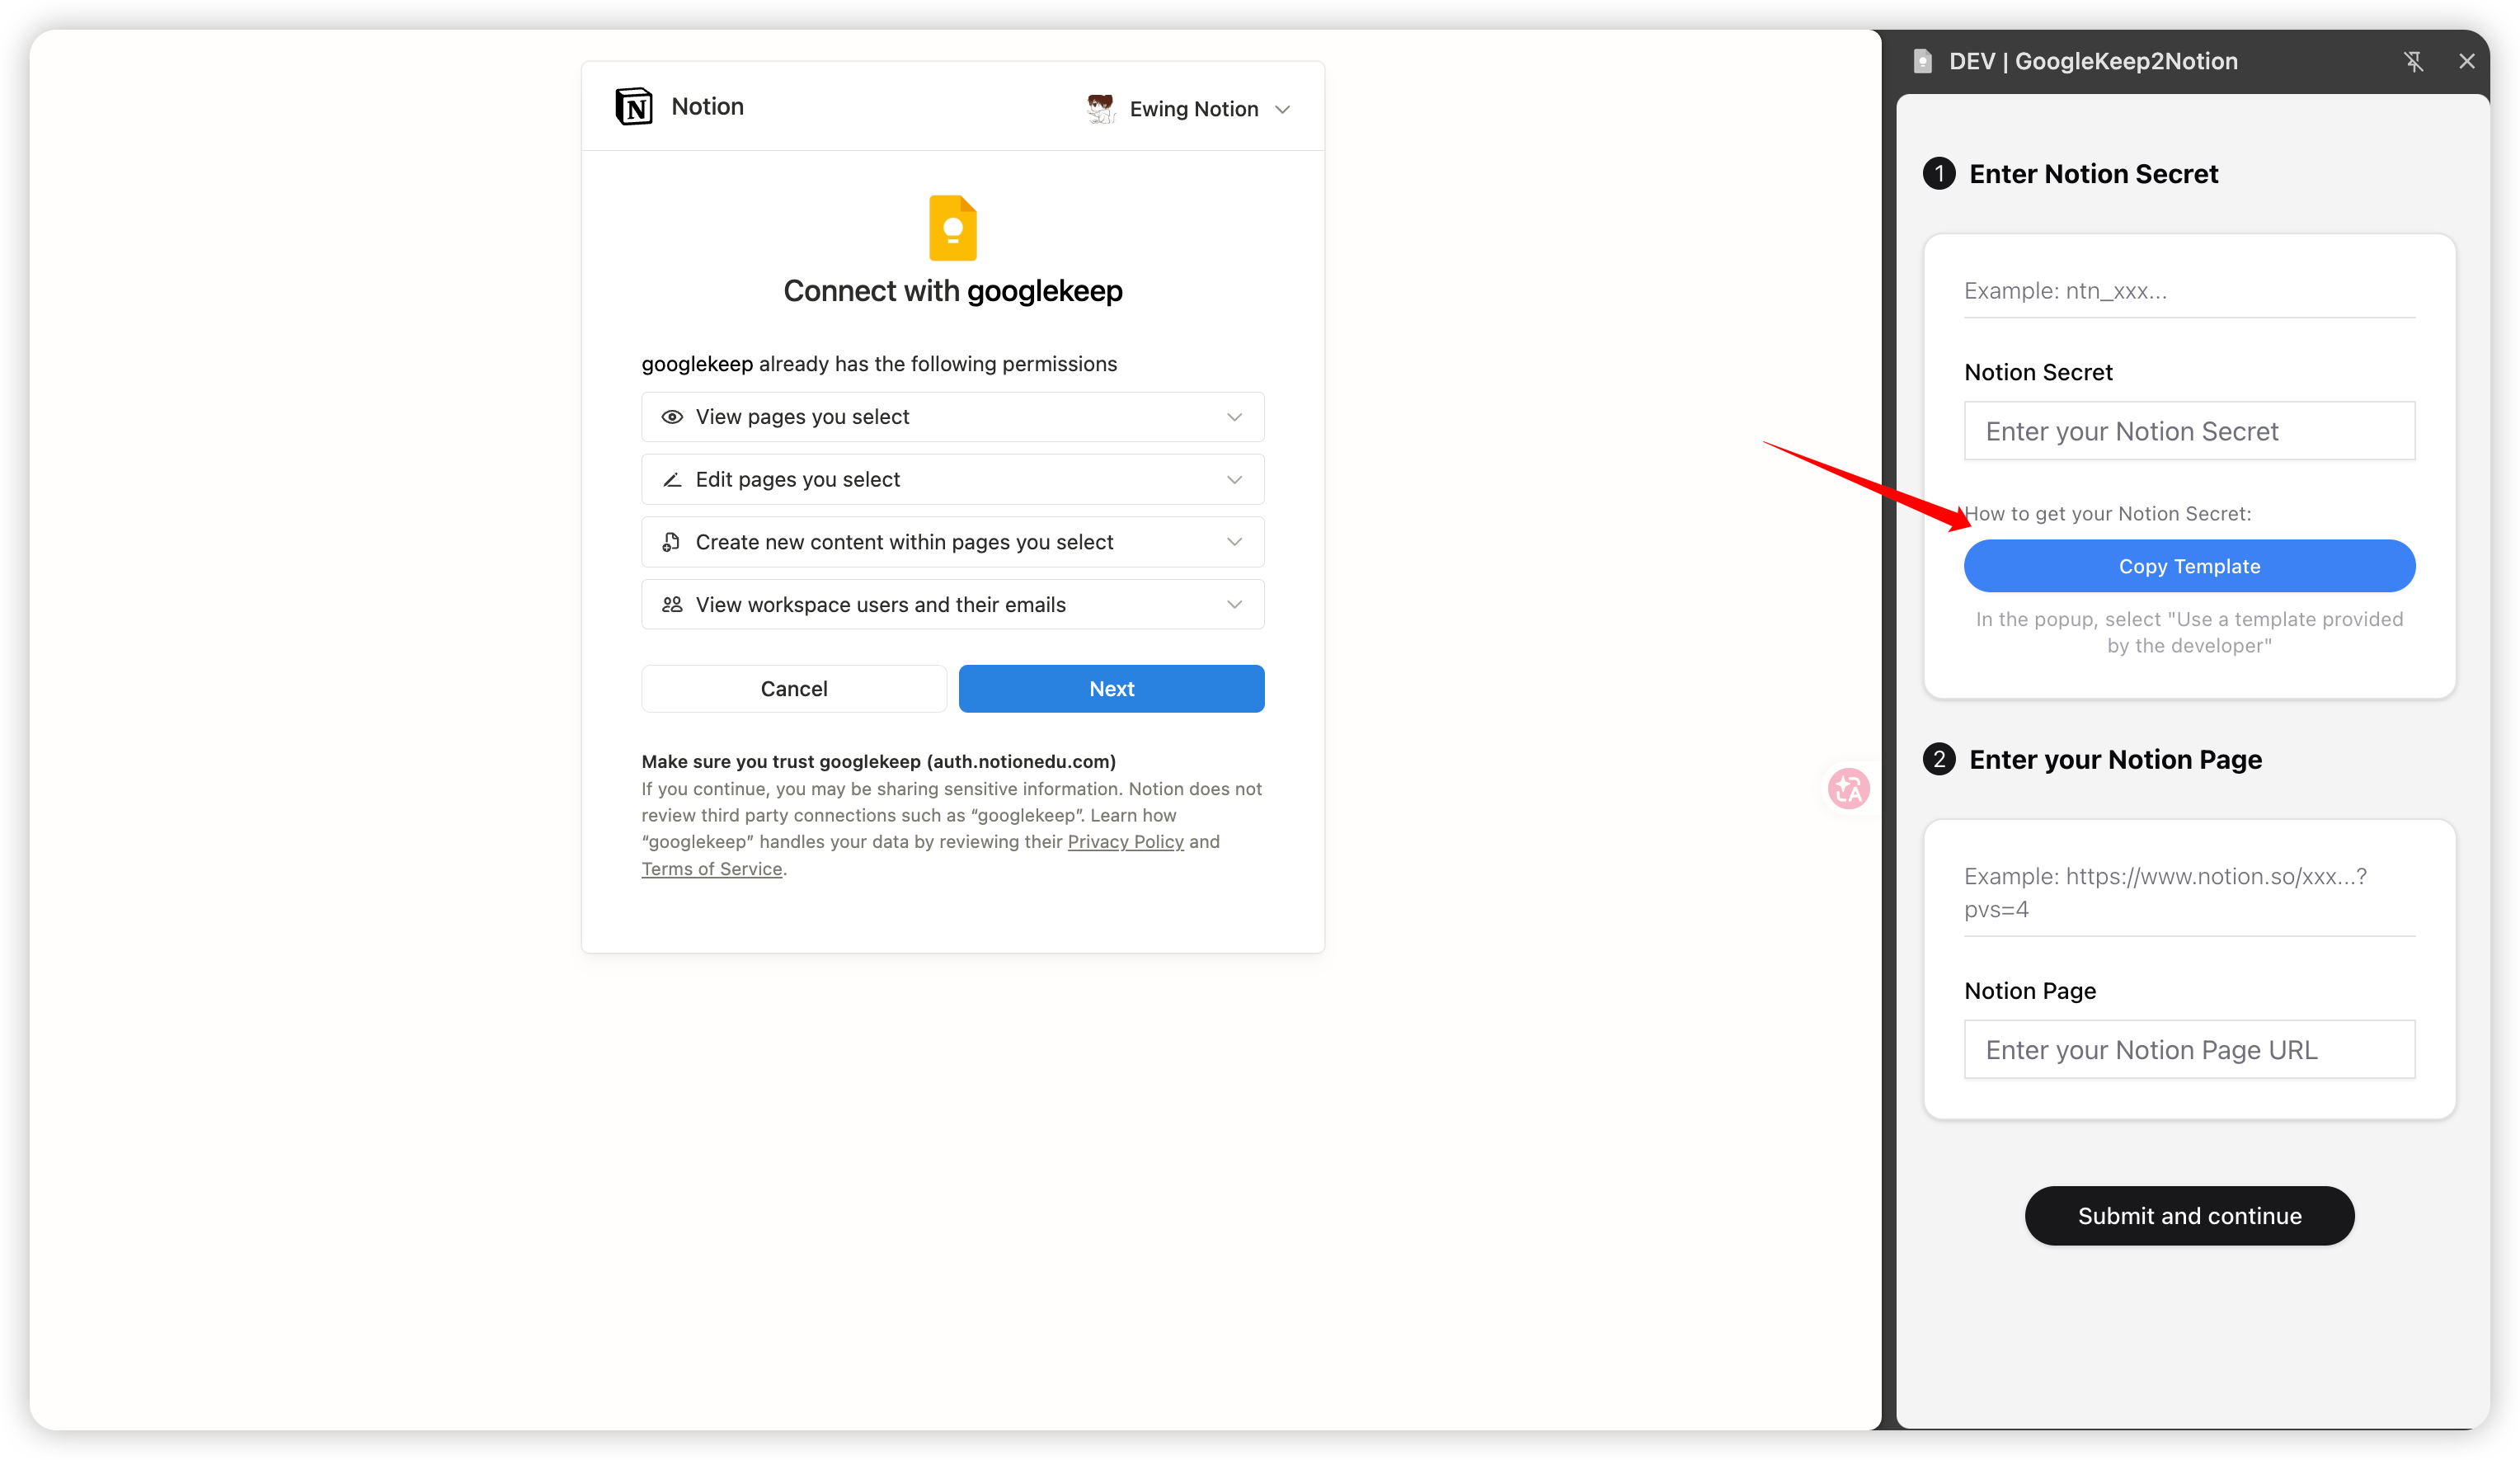
In the "Notion Secret" section, click "Copy Template (Recommended)". A Notion authorization window pops up — no need to create an Integration manually.
- 3
Authorize Notion and Save the Template
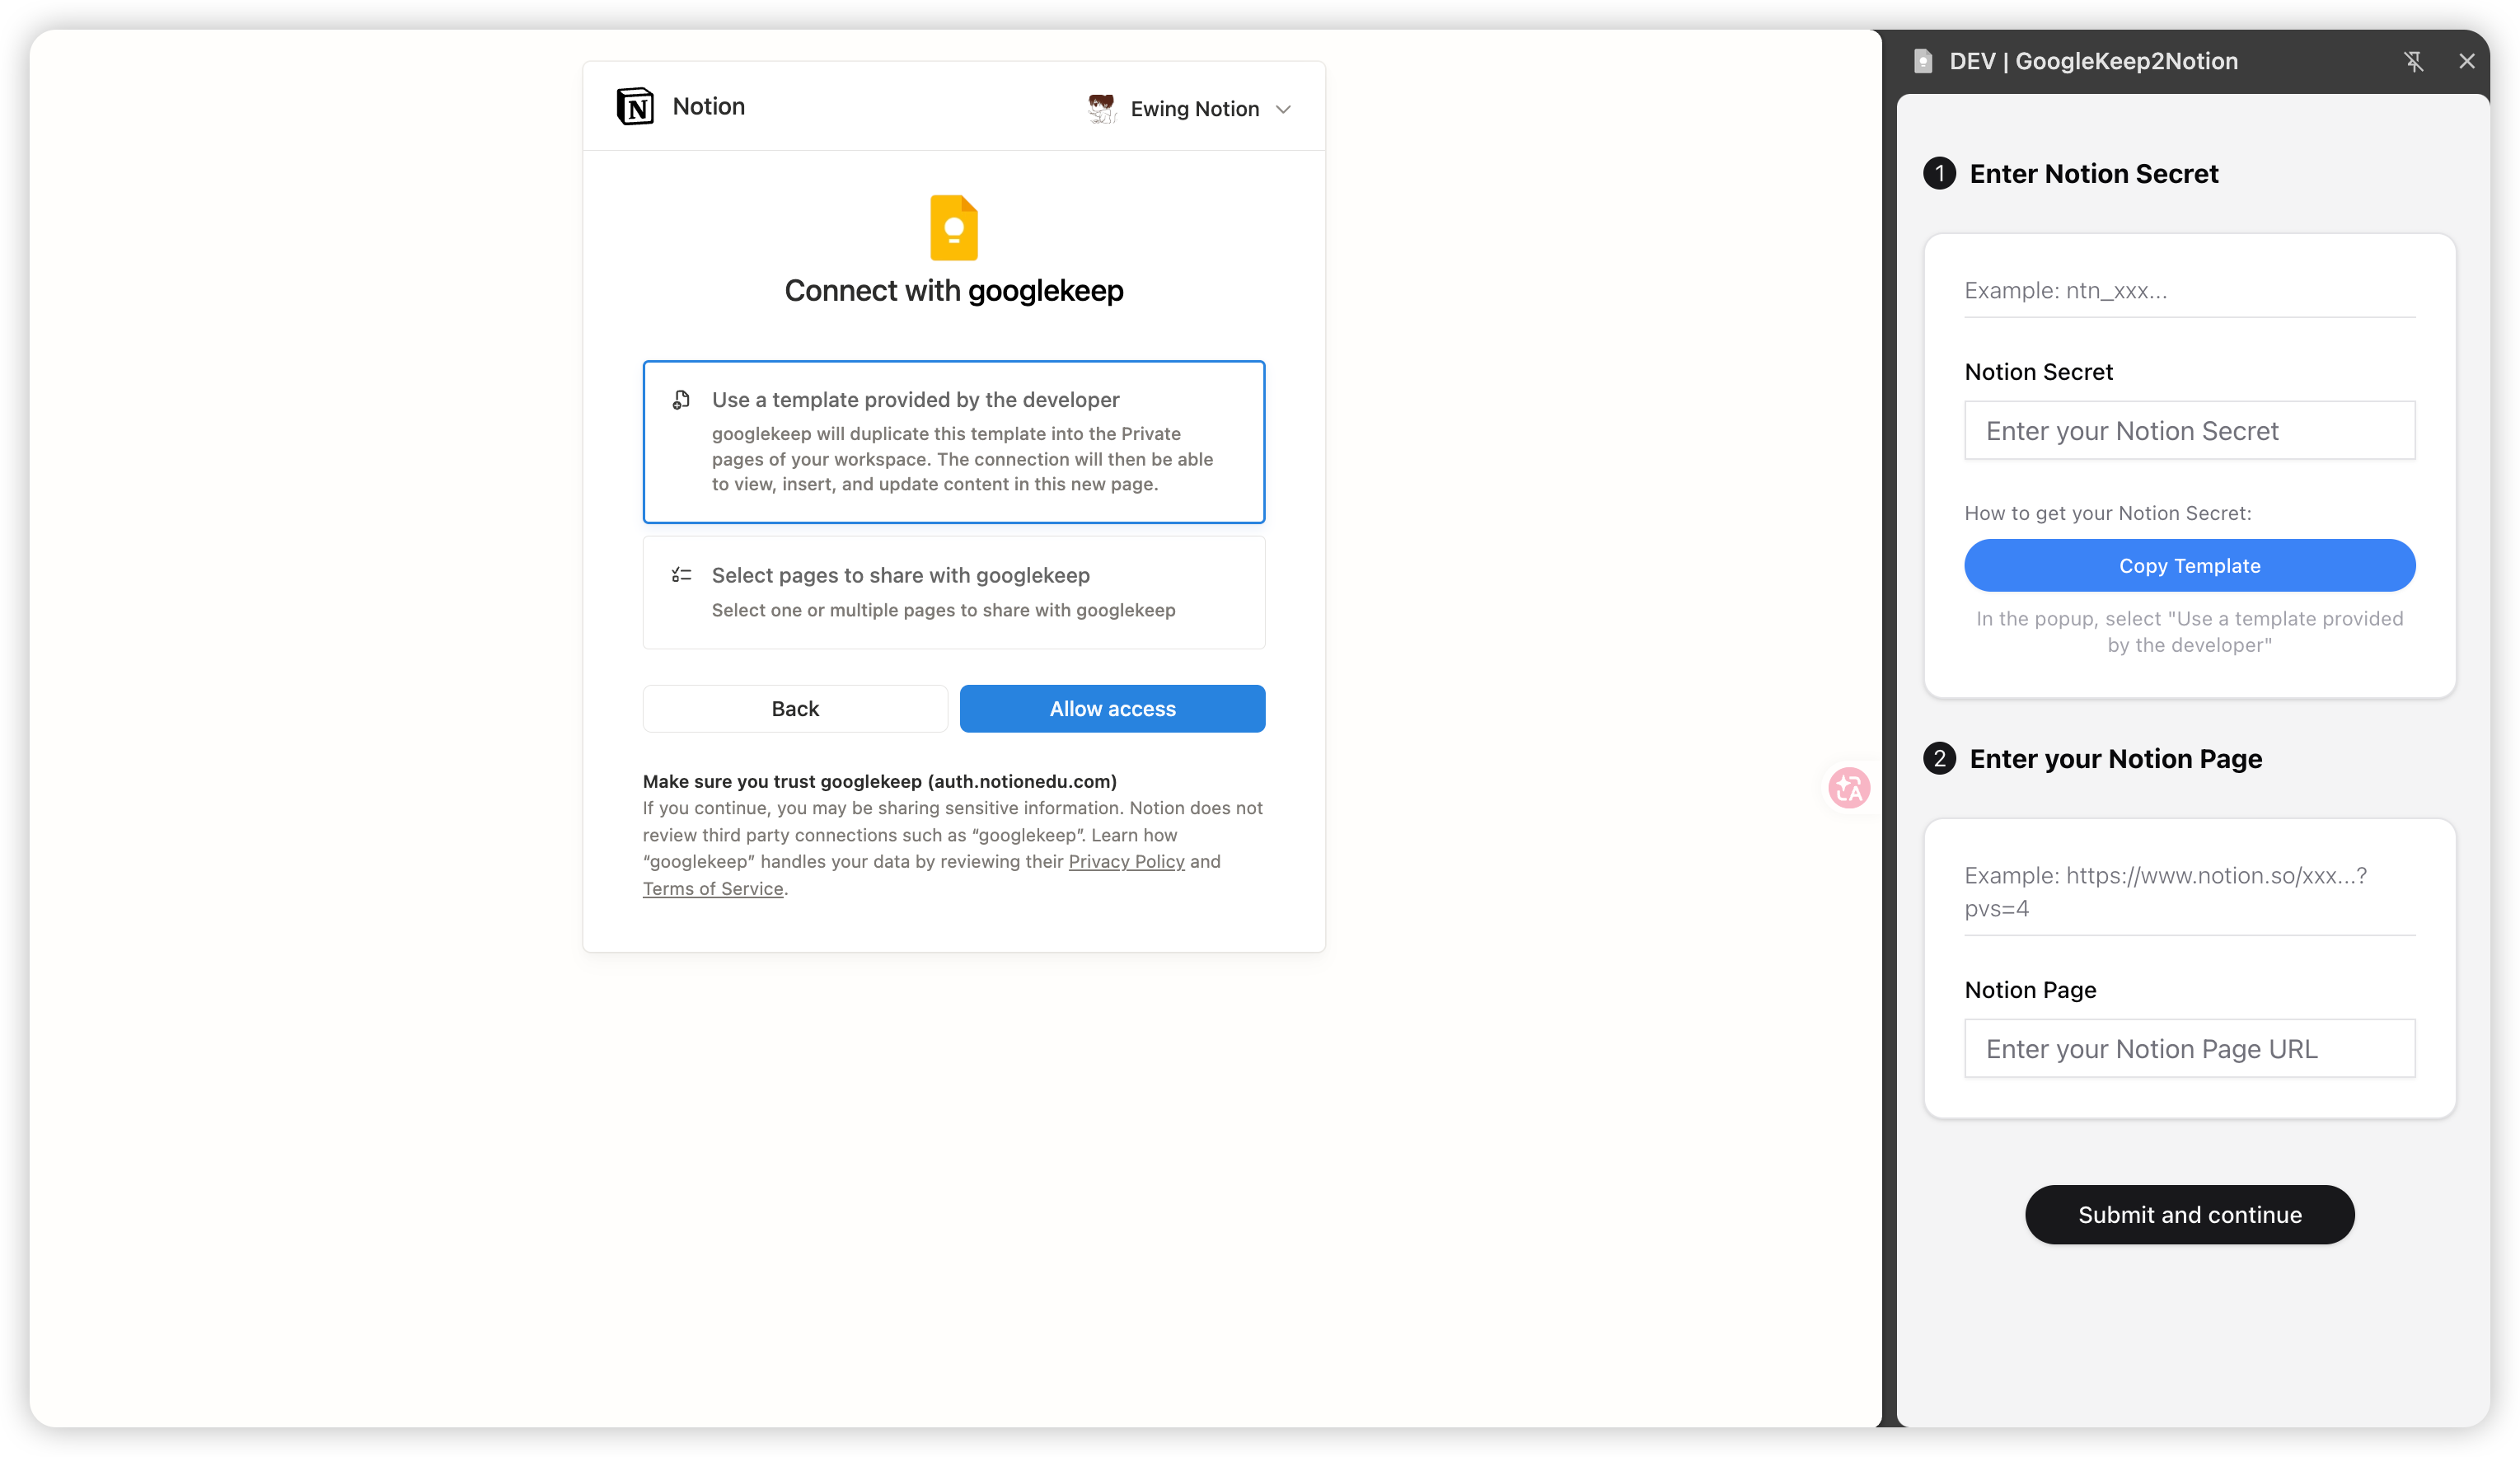
In the "Connect" window, choose "Use a template provided by the developer", then click "Allow access".
The official "Google Keep Notes" template is duplicated into your workspace. Please don't rename it or change its fields.
- 4
Copy Your Notion Secret & Page Back to the Extension
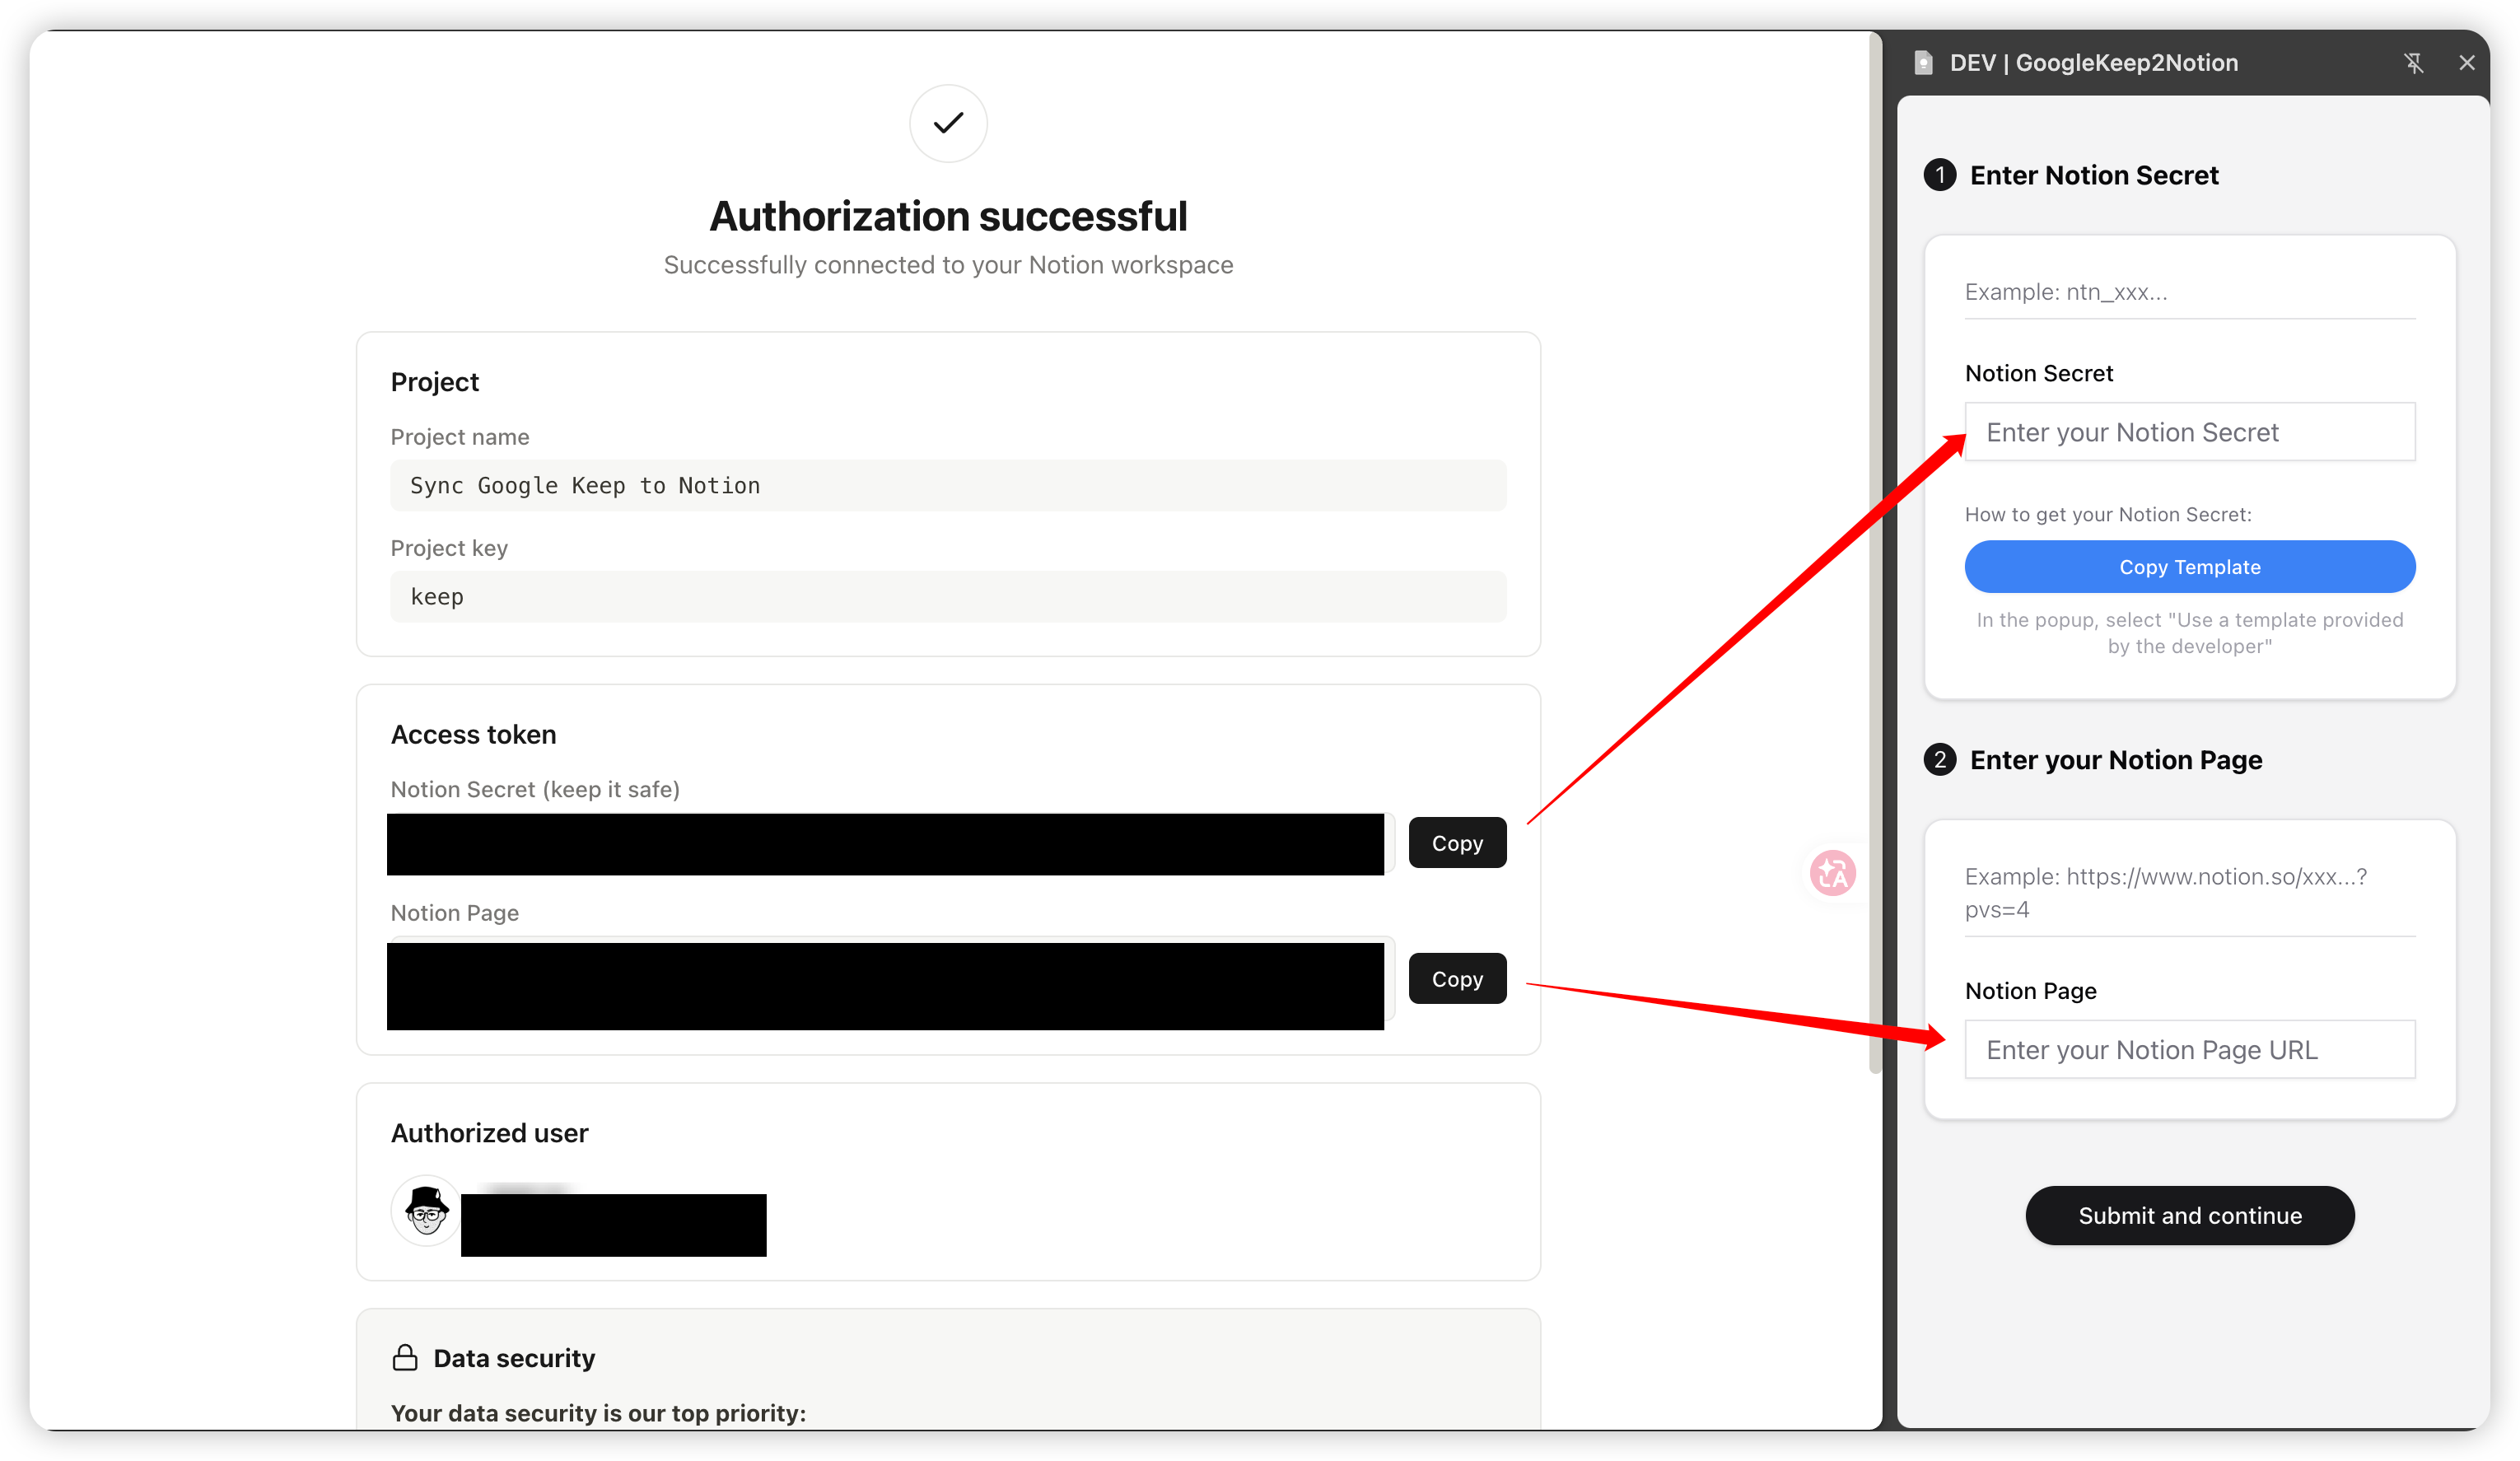
On the success page, copy the Notion Secret (token) and the Notion Page link.
Paste them into the "Notion Secret" and "Notion Page" fields in the extension, then click "Submit & Continue".
- 5
Enable Sync
Make sure you are logged in to Google Keep (keep.google.com) in the same browser and the tab is open. The extension reads your current Keep session locally — no password is ever sent anywhere.
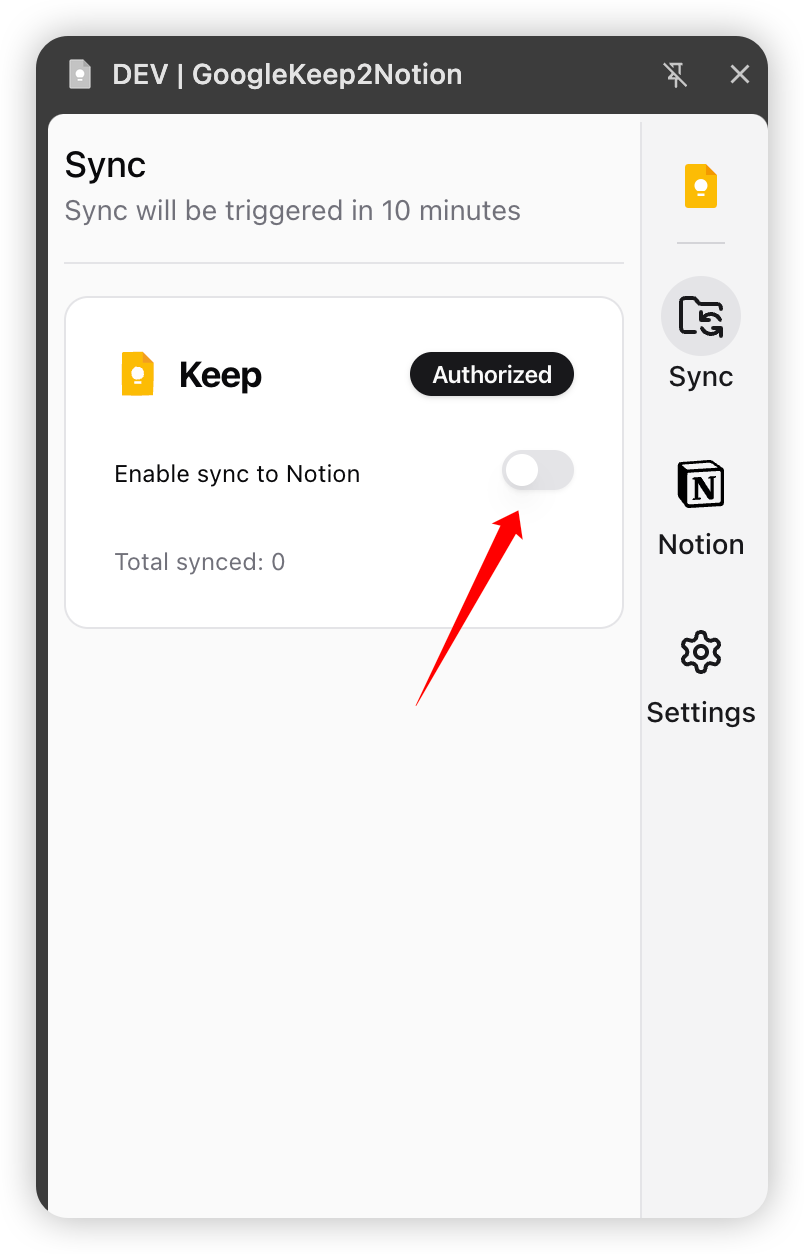
In the "Sync" panel, turn on the "Enable sync to Notion" toggle. The first run syncs your history; after that new notes sync incrementally. Watch progress live in the Notion database.
- 6
(Optional) Set Up AI Auto-tagging
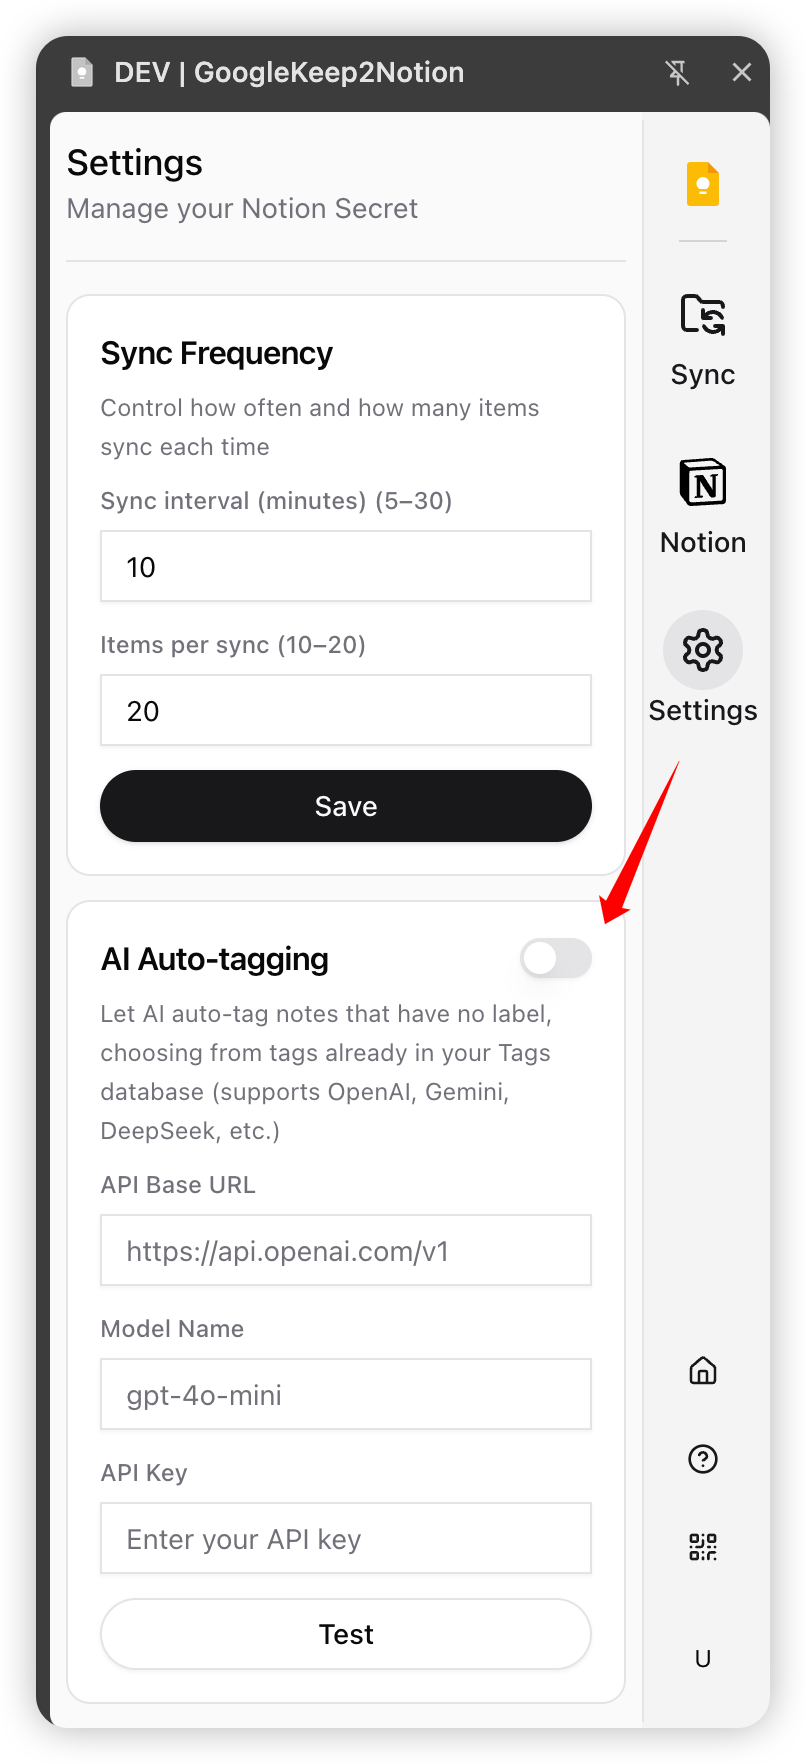
AI auto-tagging needs your own LLM API key (OpenAI, Gemini, DeepSeek, Qwen, or any compatible endpoint).
Enter the API URL, key, and model in "Settings" and enable it — it uses your own API key, no purchase required.
Important: AI only picks from tags that already exist in your Notion "Tags" database — it does not invent new ones. Create a few tags there first, otherwise there is nothing for it to choose from. It only tags notes that have no Keep label.
- 7
Unlock Unlimited with an Auth Code
Buy a Lifetime Auth CodeThe free trial covers 10 syncs. After that, buy a lifetime auth code on the pricing page.
Enter the auth code in the "Auth Code" step of the extension to permanently unlock unlimited sync.
Tips
- •One auth code permanently unlocks unlimited sync; it binds to your Notion account on first use.
- •Syncing runs locally in your browser. The extension never uploads your Google Keep session or Notion Secret to any third-party server.
- •If sync acts up, confirm you are logged in to Google Keep and that the Notion template hasn't been altered, then check the "FAQ" on the home page.